
Through Google Analytics users can access an advanced system built by Google which tracks user website interactions. Through Google Analytics users receive knowledge about their site discovery methods together with information on their page pathways and visit duration and behavior.
Users who want to design responsive websites through Webflow benefit from its visual creation platform which does not require any coding experience. The platform provides space for users to integrate their own customized code to streamline tool installation particularly when aiming to add Google Analytics.
The integration of Google Analytics with your Webflow project allows you to perform the following functions:
1.Track page views and user behavior
2.Study your audience profile along with their hardware conditions
3.Monitor site performance over time
4.You should make choices based on data to enhance your website.
Why You’d Want to Add It:
1.Your site becomes accessible to gain understanding about user behavior patterns
2.Identify high-performing content
3.Your website will gain better SEO performance as well as improved user journey through these efforts.
4.You should measure critical actions such as form submissions or purchases as conversions through this platform.
Analytics and Targeting Tool Options
1.Google Analytics:
Google Analytics stands as the most frequently used analytics tool because it collects data from user actions and website visitors and their referral patterns as well as conversion metrics. GA4 also known as Google Analytics 4 is available as GA4 now because it delivers improved tracking functions through event-based data and cross-platform measurement abilities.
2.Facebook Pixel (Meta Pixel):
A powerful targeting tool for Facebook and Instagram ads. Through this tool site users' interactions receive tracking which allows businesses to retarget their ads at users who performed specified actions or made specific visits to their site.
3.Hotjar:
Through its tools the system creates visual heatmaps and records user sessions and enables feedback functions to show how people interact with you site. Great for UX/UI improvements and conversion optimization.
4.Google Tag Manager (GTM):
Google Tag Manager serves as an on-site tag management solution which lets you handle advertising and measurement tags (including GA and Facebook Pixel) without needing to edit site code.
5.HubSpot Tracking Code:
The tracking code from HubSpot merges lead tracking functionalities into one platform with CRM and marketing tools.
Setting Up Google Analytics in Webflow
Create a Google Analytics Account:
You should create a new account at analytics.google.com unless you already operate a Google Analytics account. You need to establish your Google Analytics account before building a new property for your Webflow site. You will obtain a Tracking ID comprising UA-XXXXX-Y for Universal Analytics or G-XXXXXXXXXX for GA4.
Access Your Webflow Project Settings:
Locate your Webflow dashboard then pick the project you want to incorporate Google Analytics. Move to the Integrations tab through your project settings interface.
Paste your Google Analytics Tracking Code at this point in the code:
Insert your Tracking ID into the available field found in the Google Analytics section of Integrations tab. Universal Analytics users should enter their tracking ID as UA-XXXXX-Y. For GA4, use the G-XXXXXXXXXX code.
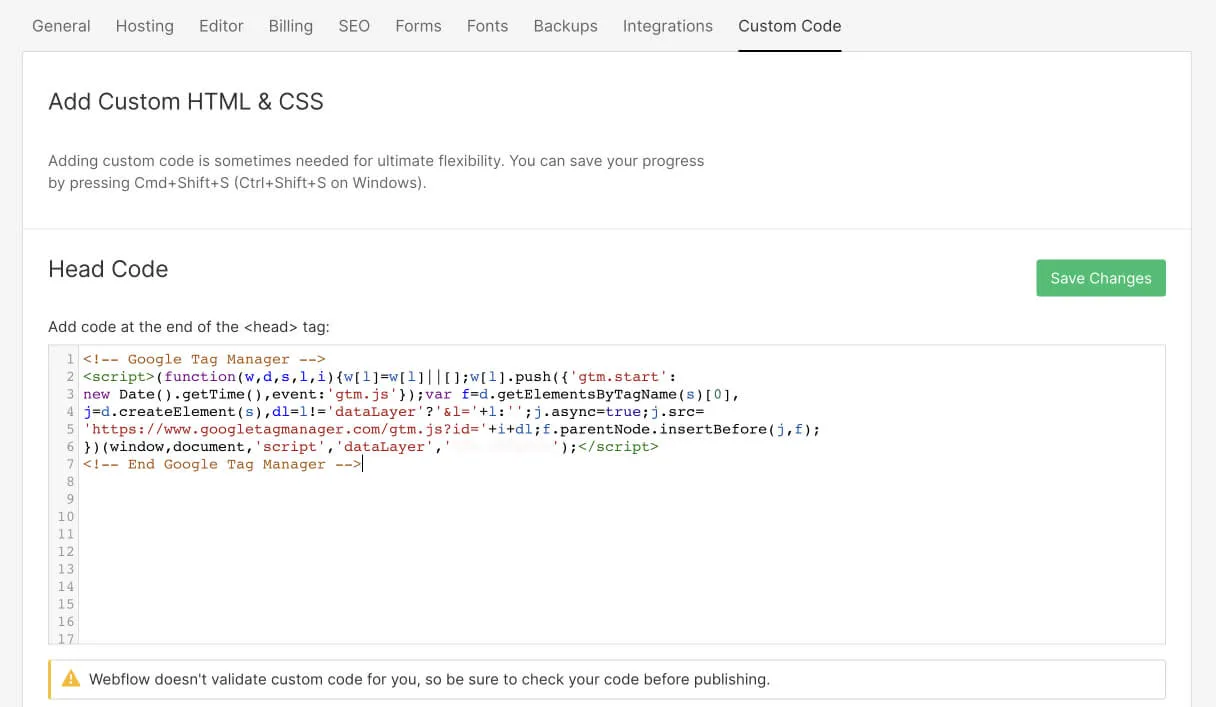
Manual embedding of the tracking code represents an optional integration procedure:
To access superior tracking capabilities users can manually insert their full Google Analytics tracking script in the Project Settings > Custom Code > Custom Code area. Keep the tracking code in either the Head Code or Footer Code section to achieve improved functionality.
Publish and Verify:
Once you save all modifications, publish your Webflow site through the platform. The tracking status of Google Analytics can be confirmed by visiting your website and checking real-time analytics data within the platform. The Google Tag Assistant browser extension verifies that tracking tags launch correctly.
Getting Your Google Analytics Tracking ID
Sign in to Google Analytics:
After signing into Google Analytics with your Google account navigate to the webpage. You must create an account first since you do not have one.
Create a New Property:
Users need to access the Admin panel through its bottom-left position (the gear icon). Click the account where you want to add the property under Account section. Go to the Property column to initiate the creation process of a new website property by clicking Create Property.
Fill in Property Details:
A form will demand your website title along with URL and industry sector and time zone information. Submit the entered data by selecting Create to advance.
Choose Your Tracking Method:
The latest version GA4 provides users with a G- starting Measurement ID through Google Analytics. When establishing Universal Analytics you will receive a Tracking ID with UA- at its start.
Access the Tracking ID:
Your Tracking IDs and Measurement IDs are accessible in the Admin panel after selecting your property followed by selecting Data Streams (for GA4) or Tracking Info > Tracking Code (for Universal Analytics). The ID appears at the upper part of the page or within the designated sector.
Add Your Tracking ID in the Project Settings
Access Your Webflow Project Settings:
Open the Webflow dashboard then select the project that needs Google Analytics before proceeding. Click the project name from the list to access the Project Settings structure.
Go to the Integrations Tab:
Under project settings users need to select the Integrations tab for further operation. The Integrations tab serves as the point to integrate various third-party services which include Google Analytics and Google Tag Manager among others.
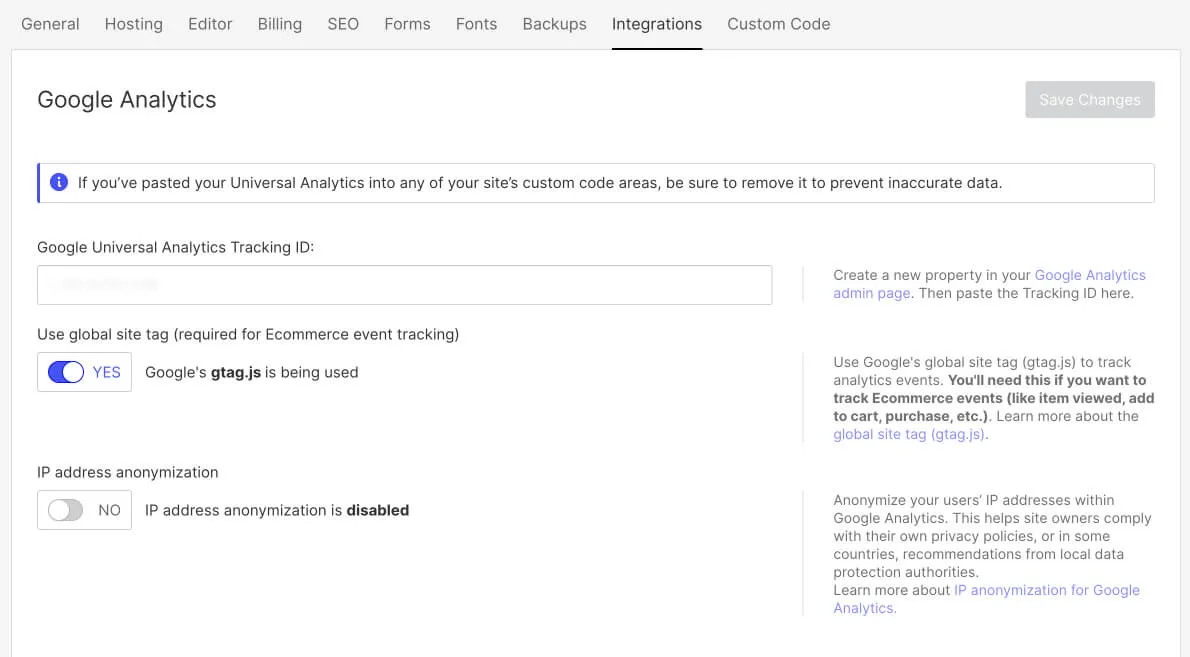
Enter Your Tracking ID:
Under the Google Analytics section you will discover the Google Analytics Tracking ID field. Place Tracking ID (start with UA- for Universal Analytics or G- for GA4 Measurement ID) in this designated field.
Save Changes and Publish:
Proceed to save page changes at the bottom of the page after you have pasted your tracking ID. The final step to activate tracking involves website publication.
Setting Up Ecommerce Tracking in Webflow
You must enable both Webflow Ecommerce and the Google Analytics integration for Webflow to automatically track your e-commerce sales. It's simple to complete and will provide you with insightful data about the performance of your e-commerce company.
The following e-commerce events will be automatically tracked by Webflow:
Viewed product: When a visitor views a product detail page, this event is initiated.
Product added to cart: When a visitor adds a product to their shopping cart, this event is triggered.
Purchased product: When a visitor completes a purchase, this event is triggered.
Setting up Google Tag Manager in Webflow
By combining different pixels, codes, and script tags into manageable tags, Google provides a tool that can help you further enhance your analytics. Your website's analytics integrations will be significantly enhanced as a result.
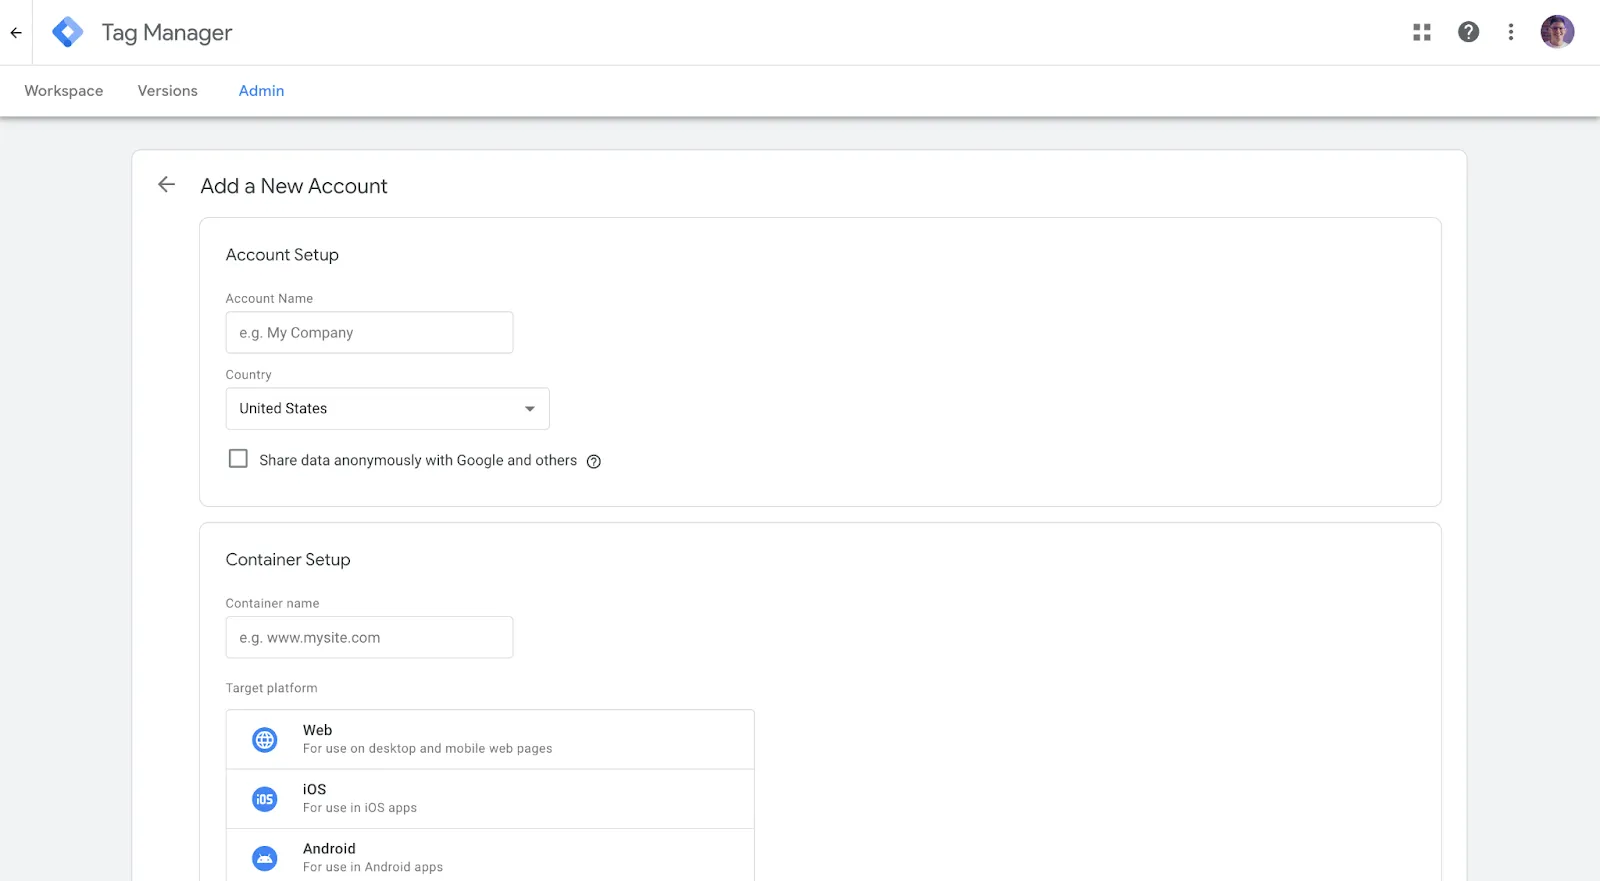
You must first create a Tag Manager account on this page:
1. Click "Create account."
2.Add the name of the account.
3.Choose a nation.
4.Prepare a container. If it's for your website, choose Web and type its address in the space provided.
5.Click "Create."
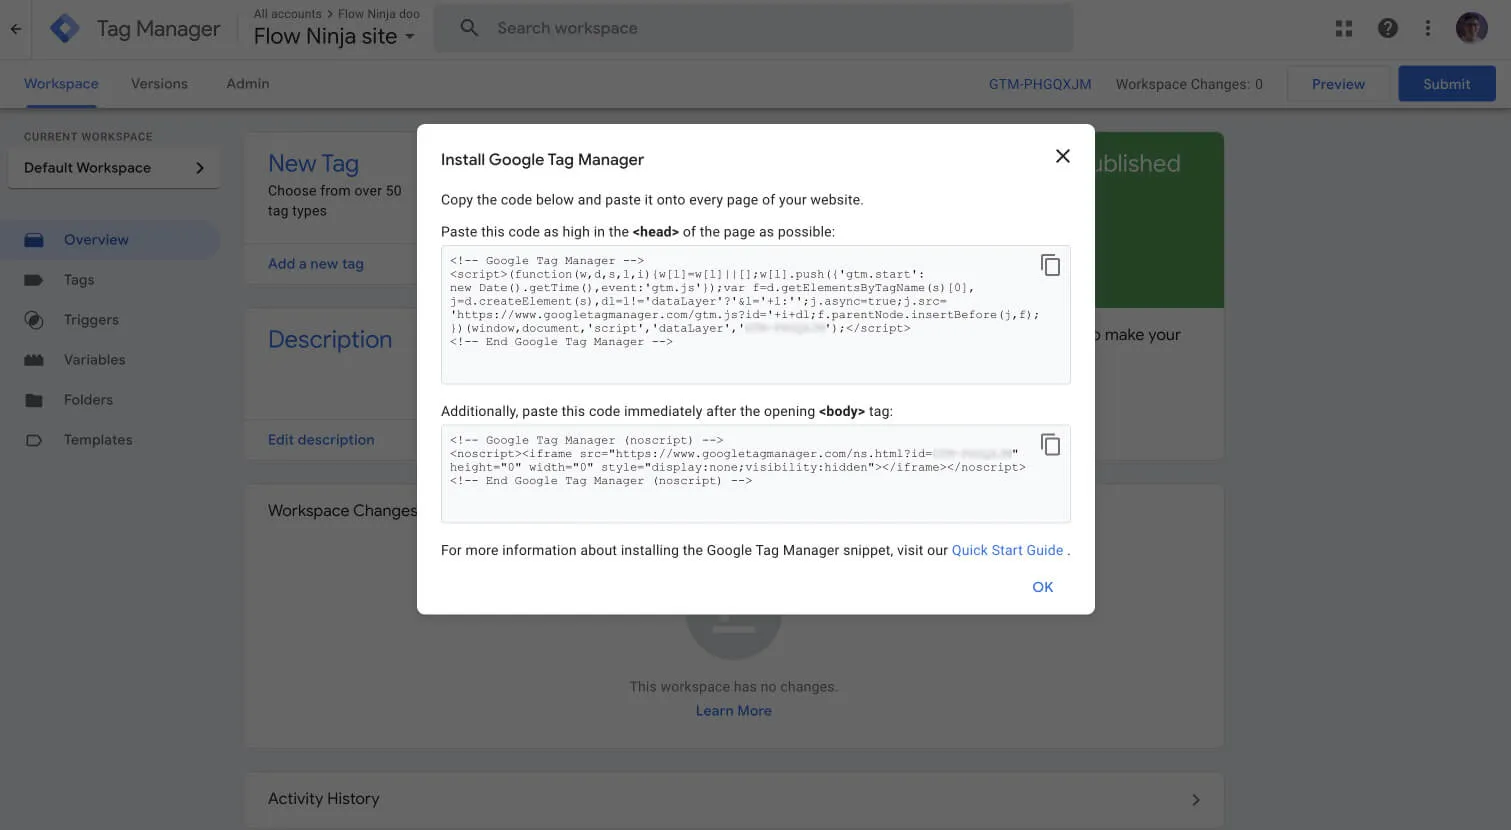
To completely integrate Google Tag Manager, you must also enter this little snippet. Since the second snippet is only needed when JavaScript is disabled in your browser, we often don't add it for our Webflow sites, so please be aware that the steps below may not be necessary in many situations. Although JS is enabled by default, you must take the following action if you deactivate it for any reason.
1.Return to the Designer.
2.Drag Embed into your project after selecting the Add panel. Verify that the first choice under Body is Embed.
3.Return to Tag Manager and make a copy of the second excerpt.
4.Go back to Webflow and insert the excerpt.
5.Select "Save & Close."
6.Pasting the Embed element on each page where you want to incorporate Google Tag Manager is simple if you utilize Webflow.
Using the Embed code in a symbol is a smart idea if you plan to embed bespoke code on numerous pages. You'll save a ton of time if you need to change the code later if you use that method when adding a symbol from one page to all other pages. If you make changes to one instance of a symbol, Webflow will impact all instances of that symbol.
Additionally, ready-made agency templates provide a rapid and effective means of presenting data and insights for agencies seeking to optimize their marketing reports. With the help of these templates created especially for marketing analytics, you can clearly display your Webflow-generated data in an understandable manner.
How to Set Up Views in Google Analytics
To configure views in Google Analytics, take the actions listed below:
1. Go to your Google Analytics account and log in.
2.Click Admin.
3.Click the account you wish to add the view to in the ACCOUNT column.
4.Click the property you wish to add the view to in the PROPERTY column.
5.Click Create view in the VIEW column.
6.Give the view a name.
7.Choose the type of view.
8.Click Create view.
Each property may have up to 25 views created. Filters, goals, and segments are just a few of the variables that can be specific to each view. This enables you to produce distinct views for various uses, like monitoring several advertising campaigns or examining various audience segments.
To build up views in Google Analytics, follow these tips:
1.Assign a meaningful name to every view so that you can quickly recognize it later.
2.Click the View Type that fulfills your demands. Webpage is the most used View Type.
3.For keeping harmful data out of your points of view, investigate using filters. You could be interested in designing a filter, for example, for keeping internal traffic off your website.
4.Establish aims to monitor particular website visitor actions, like purchasing items or contributing to your newsletter.
5.Make segments to organize visitors apart depending on factors they have in usual, such demographics, interests, or action.
How to Set Up Event Tracking in Google Analytics
You can monitor events—the actions people perform on your website—with Google Analytics. This could involve anything from making a purchase to watching a video or pressing a button. You may discover more about user behavior on your website and their interests by monitoring events.
Look at these steps to see how to track events in Google Analytics:
1.Launch Google Analytics.
2.Select All Events under Behavior > Events.
3.Click "Create Event."
4.Click "Create."
5.Put the name of the event here. The name of the event should be clear and descriptive.
6 Establish the conditions for your gathering. This will identify the user actions that cause the event to occur.
7. For instance, you could configure an event condition that starts when a user clicks on a particular button or views a video for longer than 30 seconds.
8.Set up the settings (optional). By using parameters, you can get more information about the event, like the name of the product that was bought or the title of the movie that was viewed.
9.Click "Create."
After creating an event, you can monitor it in your Google Analytics reports by setting up a conversion target. To accomplish this, you ought to:
1. Select Conversions > Objectives.
2. Select "New Conversion Event."
3. Enter the event's name that you just generated.
4. Click "Create."
5. The event can now be monitored in your Google Analytics reports. Along with other analytics like the conversion rate and bounce rate, you can observe how frequently the event has been triggered.
Integrate Site Search with Google Analytics
Visitors can easily locate the material they're looking for on your website with Webflow's site search tool. Because of this, the site search is a fantastic way to learn about the demands and behavior of your visitors. You must integrate site search with Google Analytics in order to monitor how users interact with the search function and what they are looking for.
Here's how to accomplish it:
1. Open your Google Analytics account and log in.
2. After choosing Admin, navigate to the view where you wish to configure your Site Search.
3. To enable Site Search Tracking, click View Settings.
4. Enter internal query parameters in the Query Parameter area. Search and query (type search, query) are the two most crucial ones.
5. I recommend reading Google's comprehensive article if you'd like to learn more about configuring the site search tool.
FAQ'S
How to add Google Analytics to Webflow | A Complete Guide
Where should I enter the tracking ID when working in Webflow ?
My project requires customized code independent of the integration field for tracking purposes?
Is a website republish necessary after pasting tracking code into it?
A procedure exists to check whether Google Analytics operates properly on my website?
We make websites that bring joy and meet your goals.
We create digital experiences that not only capture the users but also empower businesses in a highly competitive world. We are dedicated towards developing creative solutions that will easily fuse creativity with functionality, with long-lasting effects.

