

Personalizing your Webflow site and improving user experience starts with adding custom slider arrows to your Webflow slider. your unique brand look” is clearer and more natural than “special. Changing the slider arrows helps your project look more professional and is tailored to the people who will use it. If you’d like minimalist icons, striking buttons or fun animated controls, Webflow allows you to switch out the default arrows with your preferred drawings. a little creativity and a few simple steps” would sound smoother and more precise. You will learn in this guide how to incorporate attractive custom slider arrows that easily fit into your website.

Install Instructions
1. Add the booster script to your project.
Place the booster script in your Webflow project by attaching it to either the <head> or right before the </body> section of the page and your order will increase automatically. Thanks to this script, your site runs better, you can add unique animations and it easily connects with third-party systems for an enhanced user experience.
2. Add the slider element & hide the default arrows
You should add the Slider element from the Add panel to the section you want to personalize first. These default left and right arrows, slides, and navigation dots. You’ll need to hide the default arrows if you want to use personalized ones. Select both default arrows on the Navigator panel and then head to the Style panel. Give their Display property a None value. The sections are no longer visible, but the slider still works. Because the defaults are hidden, you can now customize your arrows and place them where you want them.
Add the following attribute to the Slider Wrapper:
- Name: fb-slider Value: true
Set the default Webflow arrows and slider navigation dots to hidden. Since we'll be creating custom arrows to avoid Webflow’s default limitations, simply add a class to them and set their display:none.

3. Build the custom arrows (Buttons / Links etc)
To start creating custom arrows in Webflow, take advantage of elements like Buttons, Link Blocks and Div Blocks as a base. Position the Slider element within the content and keep your slides outside it, for the most control over layout. Add or upload the arrow and then customize it with the Style panel by sizing, choosing a color, positioning it and setting different states for mouse hovering. For each arrow, give it its own class (you could create a custom-left and custom-right class). Be sure to locate them with regard to the slider using absolute or flexbox positioning. Later, these custom elements will be connected to GSAP or Webflow so they can be interactive.
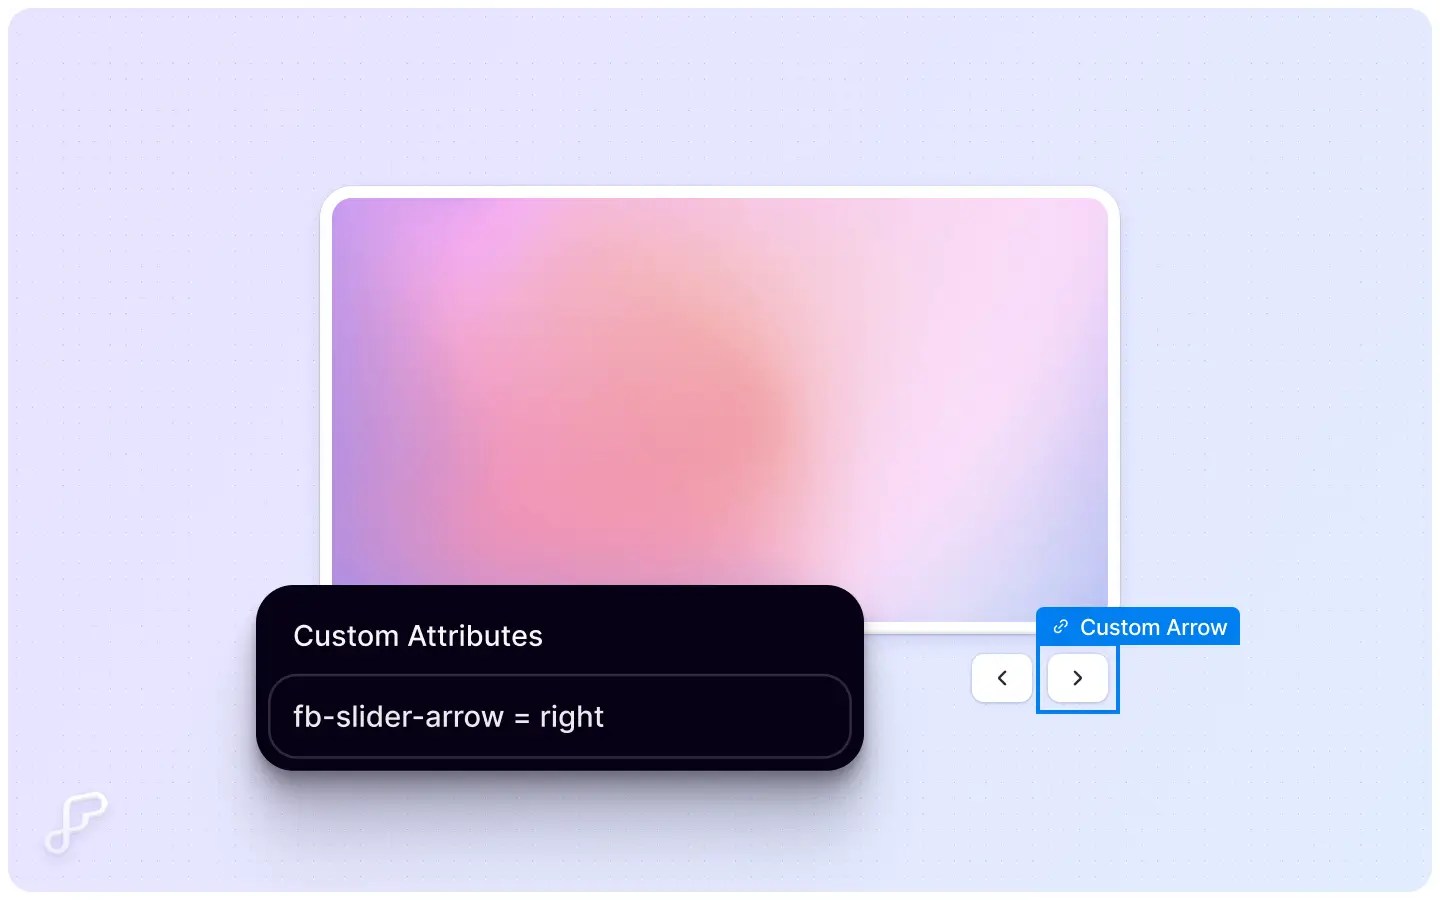
Just make sure to add these attributes to your buttons:
- Name: fb-slider-arrow Value: left
- Name: fb-slider-arrow Value: right

4. Add custom slider dots (Optional)
You can use custom slider dots in Webflow to further your design and improve user experience, if you wish. First, in the Slider Nav component, set Display to None in the Style panel so you won’t see the default slider dots. After that, manually create a line of Div Blocks or Buttons just below your slider. Set each of them as a dot (a circle or square) that is all the same size and positioned the same and give them a hover or active state to highlight the active slide.Coming soon, you’ll be able to use Webflow interactions or write custom JavaScript to make them behave and look good on any device.
Use the following attributes for each state:
- Name: fb-slider-nav Value: active (for active state)
- Name: fb-slider-nav Value: inactive (for inactive state)


5. Publish & Test 🚀
When you’ve set up your arrows and added the optional dots, publish your site and check how it works. Press the Publish button at the top-right of the Webflow Designer and select the domain you want. After launching the site, get it on a browser to review and use the slider feature. Check that your custom arrows guide the audience correctly through each slide and that your custom dots take them to the right spots when clicked. Test your site across various devices and adjust any layout issues. The final process helps your custom slider run smoothly and look nice for your visitors.
Conclusion
Overall, tailoring how slider arrows and navigation work adds to your site’s appearance and attracts more users. If you change the default arrows with custom buttons, icons or link blocks, you can style your content any way you like. While not required, custom dots improve usability and give the slider a visual calendar-like appearance Minor changes to the appearance and a few quick scripted options can make your slider appear totally in line with your website’s vibe. Don’t skip testing your slider by publishing it and seeing how everything functions on other devices. No matter what feeling you’re aiming to create, a custom slider will improve how professional your project looks on Webflow.
FAQ'S
How To Add Custom Slider Arrows To A Webflow Slider
2.Can I use SVG icons for custom arrows?
3.Will hiding the default arrows affect my slider’s functionality?
4.How do I make my custom dots interactive?
5.Are custom sliders responsive by default?
We make websites that bring joy and meet your goals.
We create digital experiences that not only capture the users but also empower businesses in a highly competitive world. We are dedicated towards developing creative solutions that will easily fuse creativity with functionality, with long-lasting effects.

