
When you change the Open Graph image within Webflow you get advanced control over how your website appears when shared across Facebook, LinkedIn and Twitter. Your link becomes more attractive to click through by selecting the right Open Graph image which serves as the visual preview. Updating the image is possible using either the Page Settings or Project Settings in Webflow. This guide provides step-by-step instructions to both set and modify your Open Graph image rapidly.
A Step-by-Step Guide to Updating Your Open Graph Image in Webflow Consisting of 15 Procedures
- Log into your Webflow account: Use your login information to access webflow.com through the platform.
- Open your project: Select the website project that needs image updating from the list of projects.
- Go to the Pages panel: For viewing your pages click the page icon which appears on the left-hand side of the screen.
- Select the page from your list which needs modification: Open the page settings by clicking the gear icon located on its specific page.
- Scroll to SEO Settings: Navigate to the end of the Page Settings window to view the Open Graph Settings.
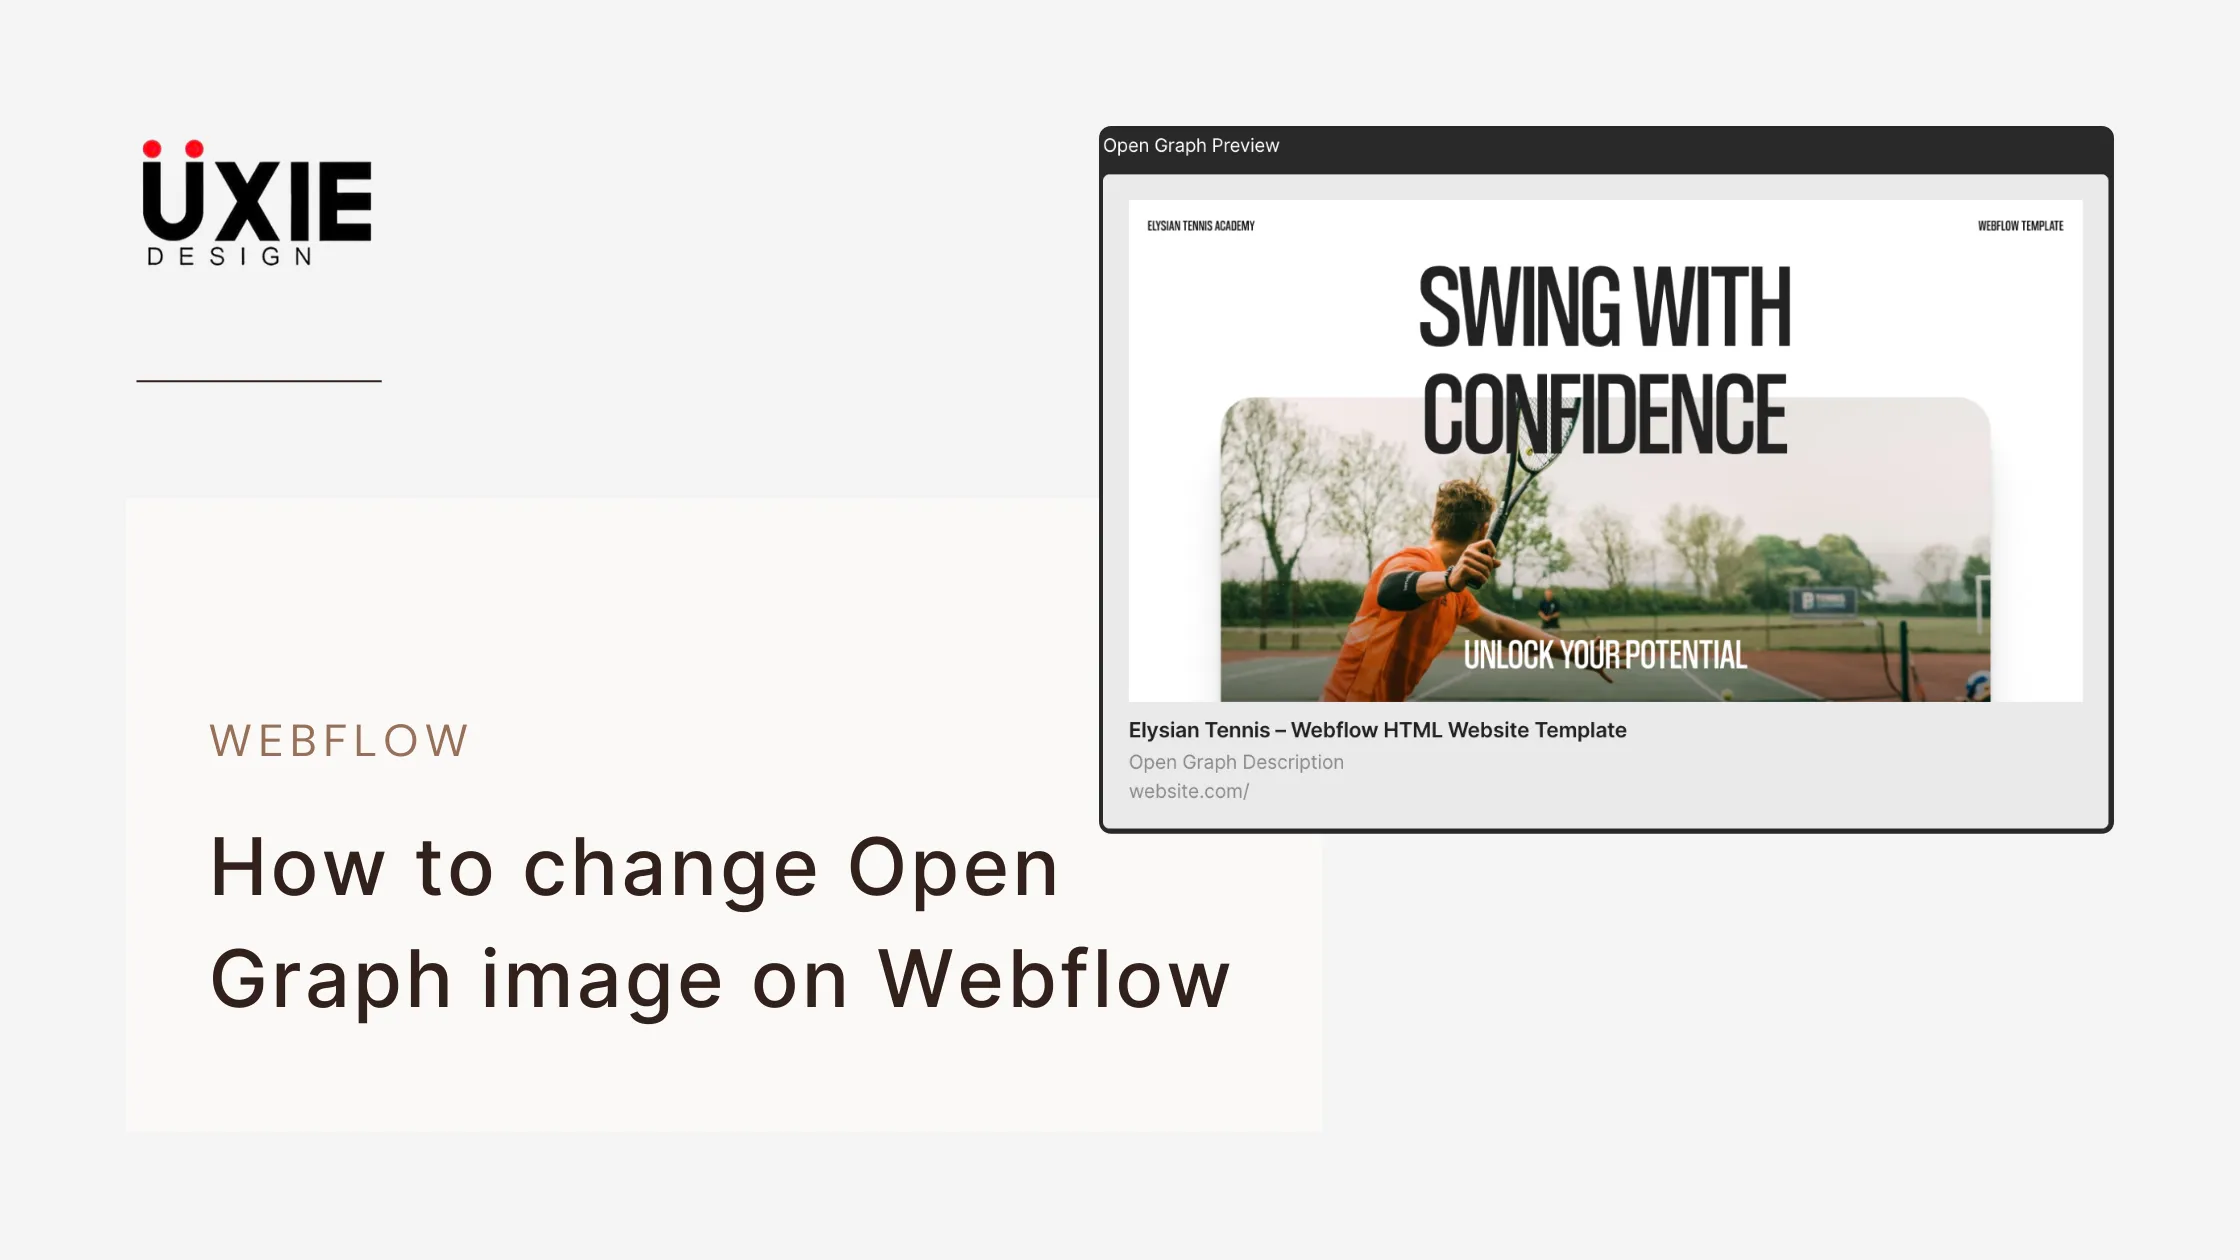
- The Open Graph image section can be found within the page: You should locate the Open Graph Image URL section.
- Click “Choose Image” or “Upload”: The application provides two options to upload an image: you can either choose one from your computer storage or from your existing assets.
- Select your image: Use an image which clearly sums up your page and relates to its content.
- Use the right image size: The preview will benefit from an uploaded image when you use dimensions of 1200 x 630 pixels.
- The uploading process will finish before continuing: After the image upload process you will notice the thumbnail representation of your selection.
- Add a title and description: The section below the image gives you space to create customized text that appears during social page sharing.
- Click “Save” at the top: Select the Save Changes button before exiting the Page Settings.
- Publish your site: Select Publish in order to activate the website updates.
- Verify your page link through the use of a social preview tool: Facebook's Debugger functions as well as alternative tools let you verify your image presentation is accurate.
- You're all set: Your new image along with text combination will automatically display when anyone shares your link.
Conclusion
The modification of your Open Graph image through Webflow lets you define the visual presentation of your website during social media sharings. A few basic steps let you add your own image while modifying the title and description until your link preview becomes more sophisticated and attractive. Your small update of the social media preview image enhances the way people notice your online content regardless of whether you share your portfolio page or business page or blog. Your website attracts viewers with its new ideal appearance.
FAQ'S
How to change Open Graph image on Webflow | 15 second guide
2. Can you use any image size for your Open Graph image?
3. Do you need to change the Open Graph image for every page?
4. Where can you see your Open Graph changes before sharing?
5. What if your new image doesn’t show after publishing?
We make websites that bring joy and meet your goals.
We create digital experiences that not only capture the users but also empower businesses in a highly competitive world. We are dedicated towards developing creative solutions that will easily fuse creativity with functionality, with long-lasting effects.

